MID FIRE GLAZES ACTION: Receive 15% off with code SPEEDBALL15. Runs through May 31.
Please note: We will be closed on May 29. No packages will be shipped this day!
The Archie’s Series can be challenging to use, but rewards your skill with some of the finest glazes available. They flow and react with other colors dramatically, creating fantastic finishes unlike anything possible in an electric kiln. They can be fired either simply or by slow cooling (this has very different results).
Most Coyote glazes have a fairly average expansion rate and will probably fit most average clays. The Archie’s series can” shiver” if used on a clay body with a high expansion rate, so make sure these glazes match the clay you are using. The S&G 254 is not a good match if you sit the Archies directly on this.
We do have a good solution for this. By using mayco’s engobes as an interlayer the archies do match the S&G254 😊!!!
We tested all the colors on 2 mayco engobes and the results are surprisingly beautiful!
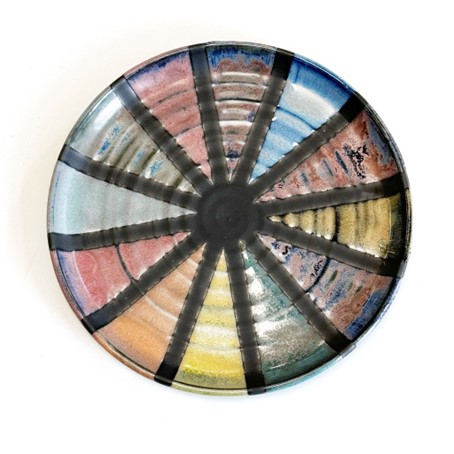
On the first scale, we put the speckle engobe as a base on the scale. Over that we put all the colors from the archie line to see how they react. This scale was made with the S&G254 and fired at 1220°C without commuting.
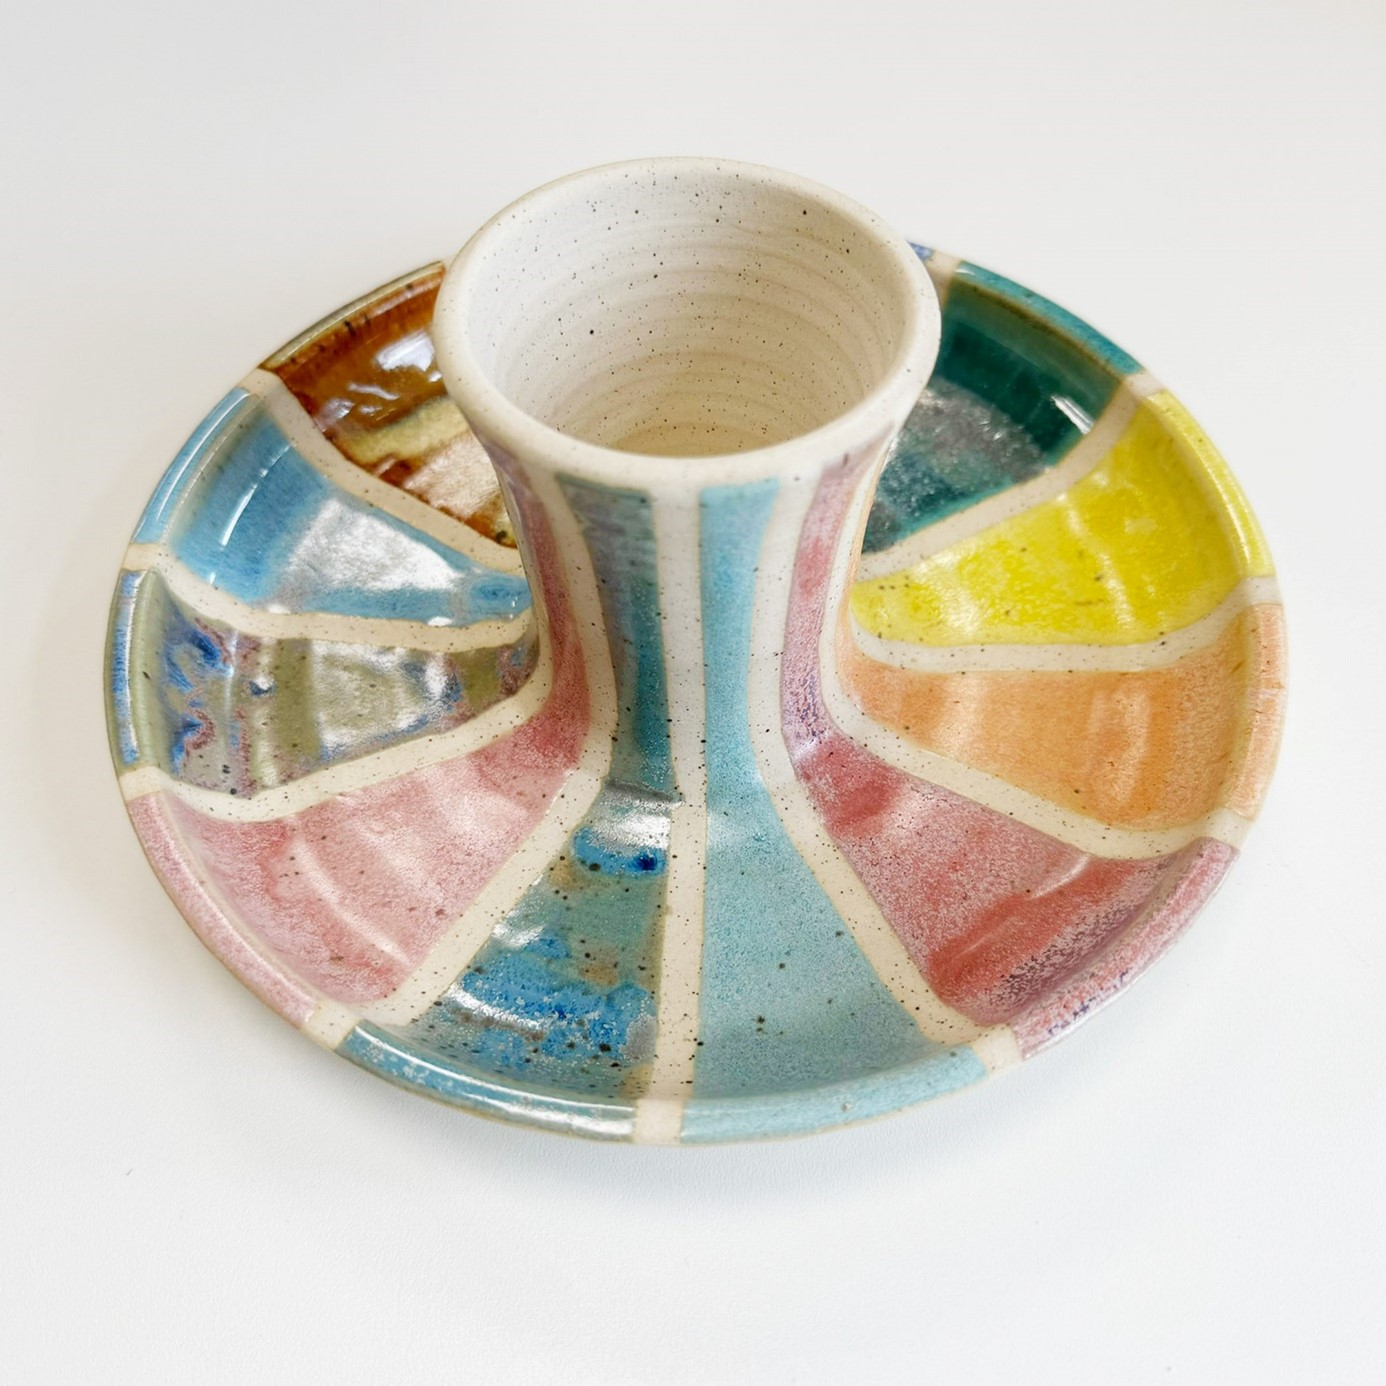
Here we put the black engobe on the scale as a base. Over that we put all the colors from the archie line to see how they react. The results are phenomenal!!! The black engobe gives surprising color effects in the archies. This bowl was made with the S&G254 and fired at 1220°C without pendulum.
Coyote glazes must be applied to cookie. The trick to glazing is to get an even application of the right thickness. Too thin and the colors can get ugly, too thick they can run out. We always clean our cookie with a damp sponge or quickly wash it off under the tap just before glazing, as the dust will wash off the glaze and the glaze brush will adhere better. Just before using, mix the glaze thoroughly.
A soft, full brush works best for the glaze, we prefer a 1″ or 2″ wide brush; it holds a lot of glaze, and gives a nice even layer thickness. It is easier to get even coverage if you alternate the direction of your brush strokes: brush the first layer from side to side, then the next layer up and down. Let each layer dry completely before applying the next.
It is important to remember that every brush and glaze is different. Most colors should look best after 2-3 coats, but you should make several samples when trying a new color or combination to find the thickness that works best for you.
Leave about 1/4″ at the base unglazed. All glazes can move/sag a bit to the bottom of your work. Some combinations are quite runny (see list below for runny glazes). Always leave enough room for your glaze to flow a bit without it staying on the kiln plate. Until you are familiar with a particular glaze, it is best to leave some extra space.
Make sure there is no glaze on the bottom of your piece; Glazes are melted glass in the oven, so if there is glaze on the bottom, or if it is too thick and runs, your pot will stick to the plate. This will break your pot and your kiln plates. If glaze has gotten on the bottom of your piece, just wipe it clean with a damp sponge.
Every kiln and firing is different. It is best to use witness cones with each firing.
Coyote glazes are designed to be fired between cone 5 and cone 6. This is between 1180 and 1220 °C.
All examples we make are fired at 1220°C without commutation.